I wanted a cute, soft yet fun lamp that reflected my style and would add a nice "pop" to a space. Chevron is so popular right now, but I wanted to give the sharp geometric lines a softer side.
Here are the materials I used for this project:
-Krylon Indoor/Outdoor spray paint in Ballet Slipper
-Frog Tape
-Tape measure
-Xacto Knife
-Stenciling brush/sponge
I used a drum shade from Target (size medium)
I found this great base from Target as well (size medium)
First step was to tape a strip the whole way around the shade to use as a guide for where I wanted my chevron points to be. This kept everything nice and even. I measure my line about 2.5" from the base. I measured this strip the whole way around to make sure everything was lined up equally.
I then started to tape my chevron stripes. I overlapped the pieces of tape, and gently cut the excess with an Xacto knife. I used that strip from the first step to make sure everything was even.
Whew! This took me awhile...a lot of taping and re-taping, but I finally got everything lined up and looking sharp.
Then I started painting. I decided to use the spray paint with a stenciling brush. I thought the watery wet spray paint, used with the stenciling brush would give the chevron stripes a softer look.
I sprayed the paint onto the plate, then dabbed the stencil brush lightly into the paint. I then dabbed the brush in between the lines, making sure to keep the paint light around the tape lines so it wouldn't bleed too much.
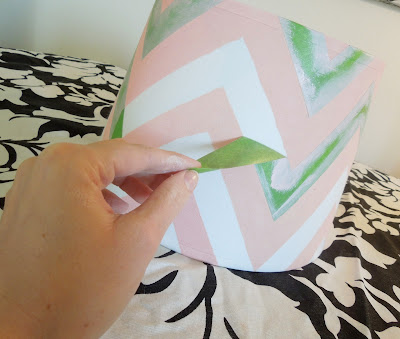
Here it is completed. I let it dry about 80% of the way before I pulled the tape off. The paint did dry very quickly on the fabric shade.
This part was exciting yet nerve wracking! I got to see how the lines turned out!
Here it is completed!
The lines are a bit rough, and not perfect, which is what I wanted to give it a softer look.
What do you think? Are you planning on tackling any projects like this? If so and you have questions, please let me know if I can help!
Have an AMAZING weekend!


loving this! It looks awesome, Heather.
ReplyDeleteIt turned out so perfect. Love it!
ReplyDelete